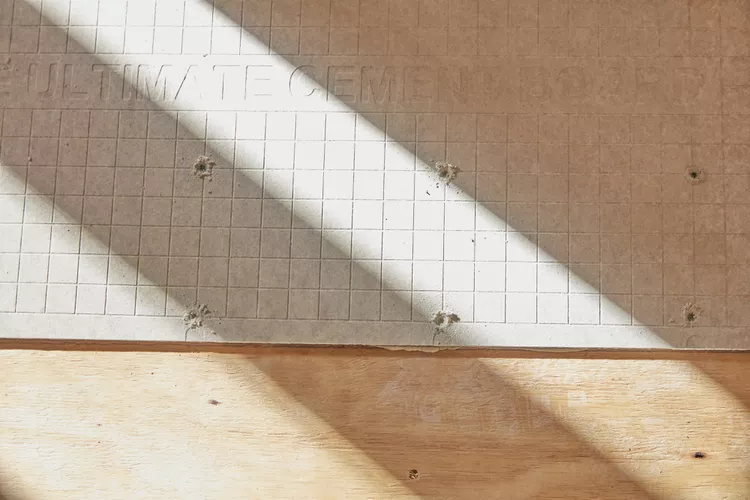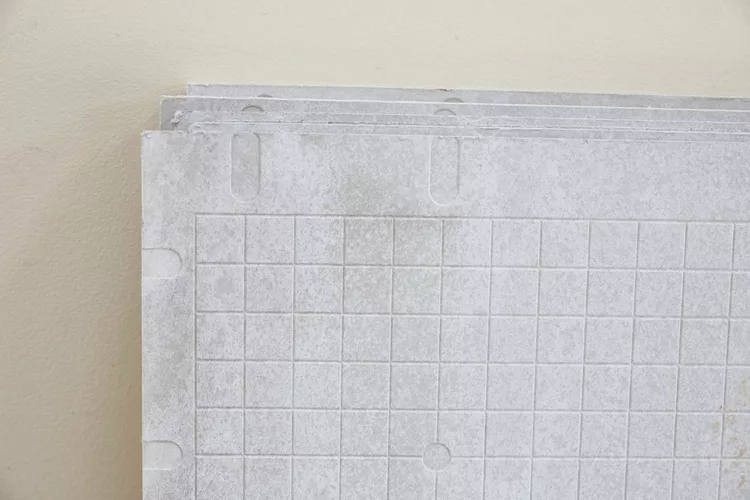
Cement backer board is an inexpensive, convenient building material that makes tiling, flooring, and countertop projects go faster and look better in the end.
Most importantly, cement backer board contributes to a longer-lasting, more durable tile installation, with no chance of backer board rot due to the lack of organic materials in the board. On top of that, cement board also reduces the chance of rot in the underlying wall studs or floor joists.
Cement backer board, also called a cementitious backer unit or CBU, is commonly used to form a base for ceramic tile. Because cement backer board is porous, thinset, grout, and mortar adhere well to it. Backer boards can be nailed or screwed into studs or cinderblock, brick mortar, or concrete. Boards can be easily cut with a hand saw, circular saw, jigsaw, or multi-tool.
What Is Cement Backer Board?
Cement backer board is a mineral-based pre-fabricated wall unit, usually 1/4-inch or 1/2-inch thick and three feet by five feet long. It is made of cement, water, silica, limestone flour, and fibers such as Kevlar or fiberglass for increased strength.

Why Cement Board Is Perfect for Tiling
To understand the value of cement backer board, consider another pre-fabricated wall unit: drywall. For years, interior walls were finished with wood strips (lath) laid over wall studs. Plasterers then troweled on plaster and waited weeks for it to fully dry.
In 1916, United States Gypsum developed the idea of doing all of that drying in a factory, thus the name drywall. All of that plaster and the structural qualities of the lath were pressed and dried ahead of time in a factory, in the form of sheets called Sackett Wall Board.
Think of cement backer board as a tile-appropriate equivalent of wallboard. Instead of workers floating massive beds of mortar on the job site, mortar beds are created in a factory and milled into thin standardized sizes.
Due to cement board’s strengthening additives, these sheets are far stronger and more dimensionally stable than site-built mortar beds. Most significant, though, is the reduction of on-site drying time, as cement backer board is dried in the factory.
How to Choose Appropriate Sizes of Cement Backer Board
The size of the cement backer board you choose depends on its use:
- Flooring: 1/4-inch, 1/2-inch, or 5/8-inch thick backer board. Use 5/8-inch exterior-grade OSB or plywood as a base.
- Countertops: 1/4-inch, 1/2-inch, or 5/8-inch thick backer board. Use 3/4-inch exterior-grade plywood as a base.
- Walls and ceilings: 1/2-inch or 5/8-inch thick backer board. Apply directly to the wall studs or joists, with each spaced at a maximum of 16 inches on-center.
Where to Use Cement Backer Board
Ceramic or porcelain tile, with its seams and numerous avenues for moisture infiltration, can eventually lead to its base material contacting with water. Once this happens, the studs can begin to dampen.
Mold, mildew, and rot result. In short, tile and grout are not inherently waterproof. Wood is not an acceptable material to use for places with constant water usage such as showers and bathtubs.
Regular drywall is not appropriate either. Many professional installers even recommend against using water- or mold-resistant drywall in high-moisture areas. In sharp contrast, cement backer board does not rot, warp, grow mold, or deteriorate when subjected to water. Cement backer board is mainly used as a sub-surface for tiling.
Cement backer board is often used as a tile base on plywood or OSB subfloor. Cement backer board on concrete as a subfloor or underlayment is usually not recommended or needed. In most cases, you can apply tile directly to the concrete with an isolating membrane intervening between the tile and the concrete.
Manufactured veneer stone is another use for cement backer board. Veneer stone cannot be applied directly to drywall or other materials that will draw in moisture from the mortar. Not only that but drywall is not a strong enough material to support veneer stone’s considerable weight. The paper facing will simply tear away.
One solution is to nail cement backer board CBUs over the drywall, tape the seams, and then grout over the cement backer board.
How to Use Cement Backer Board
Cut the Board to Size
If you have any obstructions to work around, cut the cement backer board either with a utility knife or with a jigsaw fitted with a carbide blade.
- Utility knife: When using a utility knife, also use a metal straightedge and score a line on top of the board. Then, flip the board over, fold at the score, and cut the board the rest of the way. A utility knife and straightedge are best for straight cuts.
- Jigsaw: Wear a dust mask and eye and breathing protection when cutting cement board with a jigsaw. A jigsaw is best for cutting curves or other irregular lines.
-
Apply the Mortar
Apply thin-set mortar on the underlying surface and comb it out with your trowel. Keep the cement backer boards about 1/4-inch apart.
Position the Board
Press the board into the mortar and hold it firmly for a moment. If you believe that the back is not completely covered with mortar, pull the board away and examine it. Re-apply mortar to either the board or the surface, as necessary.
Secure the Board
After pressing the board into the mortar, screw it in with screws made especially for cement backer board installation. Just as you would with drywall, make sure the screw heads are slightly depressed below the cement backer board surface.
Finish the Installation
Cover and mortar the seams with fiberglass seam tape.
Major Brands of Cement Backer Board
- Durock: Made by USG, Durock vies with HardieBacker as being a favored cement backer board for tile workers and others who work in the building trades.
- HardieBacker: Made by James Hardie Industries, HardieBacker is 90-percent Portland cement and sand, with a patented MoldBlock additive.
- WonderBoard: Made by Custom Building Products, WonderBoard tends to be more flexible than Durock or HardieBacker, making it a better choice for curved surfaces.


Your article is a valuable resource for anyone attempting to install step flashing.
“I appreciate the emphasis on using quality materials.
Thanks for breaking down the installation process so clearly
This article provides a clear and concise guide on how to use cement backer board. The step-by-step instructions make it easy for both beginners and experienced DIY enthusiasts to follow. Great resource for anyone looking to tackle a tiling project!
As someone who is planning a bathroom renovation, this article couldn’t have come at a better time. The insights on how to properly install cement backer board in wet areas are invaluable. Feeling much more confident about tackling this part of the project now.
The step-by-step breakdown of the tiling process following the installation of cement backer board is a nice touch. It completes the picture for readers who may be undertaking a tiling project for the first time. Well-organized and informative.
This article not only teaches how to use cement backer board but also educates on why it’s a crucial step in ensuring the success of any tile project. Thorough and insightful!
Cement backer board is an essential material for tiling in wet areas like bathrooms and kitchens, providing a stable and moisture-resistant surface for tile installation.